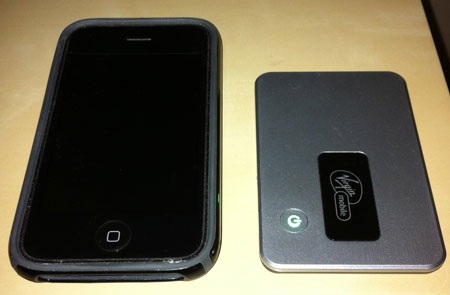
There are several MiFi devices out there these days but none as cheap as the one by Virgin Mobile. A MiFi allows you to get on a cellular network via your devices WiFi. Your laptop or iPad has WiFi but probably not built-in cellular network support. This bridges that gap. You can also use up to 5 devices thru the MiFi at one time so its more useful than a built-in connection like the high-end iPad. This MiFi 2200 can be had from walmart.com for just $139.99 with no contract. In comparison, the Verizon MiFi is $269.99. The Verizon data plan is $60/month with a 5GB data cap while Virgin Mobile offers unlimited data for just $40/month.

Activation
The first thing you have to do is activate the MiFi. This is actually different from paying for service. Activation involves creating an account, getting some special IDs from Virgin Mobile, and entering them into the MiFi. This is a simple guided process that you do by connecting to the MiFi via wireless and going to virginmobile.mifi in any browser. One odd thing is that the MiFi will not connect to 3G (EVDO) until it is activated. This means you have to go through the activation website via the older 1xRTT Sprint network which is only slightly faster than dial-up. While annoying, you should only have to activate your MiFi once. Once activated, you will then see it connect to 3G.
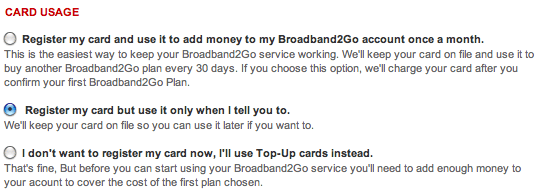
You can provide your billing info without actually starting your data plan. You’ve got an option to have your plan auto-renew which is nice if you plan to use it always. If you plan to use it only on occasional trips, there is also the option to only pay manually so when you sign up for a month of service, it will simply end at the end of the month.

Data Plans
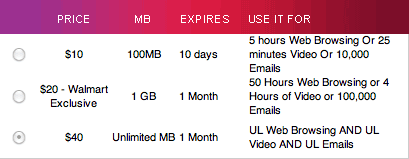
In addition to the $40/month plan that most will probably get, there is also a $10/month plan with 100MB cap. That’s a great cheaper option if you just need to use the MiFi for a short period. There’s one other secret extra special plan only available to people who buy their MiFi from walmart. For $20/month, you get a 1GB cap. That’s a nice additional plan option since that would likely cover most people for a week long trip. This is plenty reason enough to purchase your Virgin Mobile MiFi from walmart.
Performance
Virgin Mobile is owned by Sprint so it uses Sprint’s cellular network. When you are connected to Sprint 3G, you can expect typical downloads speeds of 300Kbps to 1000Kbps. While testing, I typically had 2-4 bars of 3G and averaged about 450Kbps. This is no where near as fast as most DSL or cable speeds but for the price and mobility, I think its terrific performance. If you are not in a 3G area, the MiFi will fall back to the older 1xRTT network where the best speed you’ll likely see is 100Kbps and more typical is probably half that. I recommend you check out sprint’s 3G coverage map before purchasing to be sure 3G is available in the areas you plan to use it. The 1x speeds are fine if you’re desperate for any connection but it will be painful to use. As long as you’ve got 3G, you’ll be happy with the performance, especially at just $40/month. If my home internet ever went out, I’d be happy to use this as an alternate internet connection. And since you can start your data plan through the device, you can do just that whenever you have to.
Battery Life
You can expect to get about 4 hours of continuous use from the MiFi. It can be setup to automatically power down after X minutes of no usage. This can be handy to save battery life but it is also easy to simply press the power button until the light goes out to save battery.
If you are looking for a little more battery life like me, I recommend an external usb battery like the Satechi Battery Extender Pack . The built-in MiFi has a 1150 mAh battery. This Satechi has a 4800 mAh battery. That means it has enough extra juice to fully charge the MiFi over 4 times. It can also be used to charge almost anything else powered by USB such as iPhones, iPads or most other cell phones.
Admin Options
This MiFi offers terrific admin controls. You can change the wireless SSID, the wireless password or admin password. You can even setup port filtering, port forwarding, and mac filters. Once you’ve setup your config, you can even back it up to a computer in case you ever have to reset your MiFi and restore your setup.
Conclusion
The Virgin Mobile MiFi doesn’t offer the fastest speeds. It doesn’t offer terrific battery life. But it is an amazing price with terrific data plan options. If you’re a price conscious shopper that wants connectivity for any of their many WiFi gadgets, this is the device for you. I think road warriors or occasional travelers would be happy with this device.
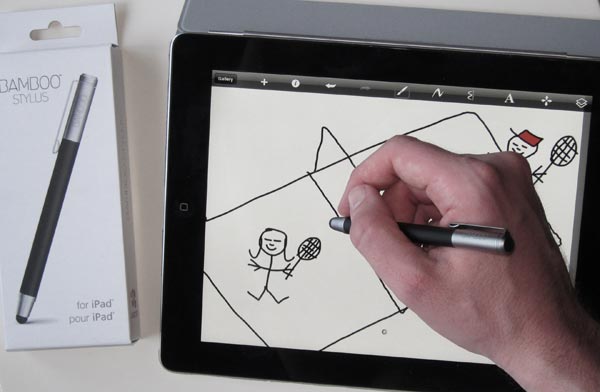
to be the best available so far. The reason is that others have a thicker pointing area that slides poorly and is less precise. The Bamboo Stylus
has a smaller more precise tip (they claim 25% smaller than competitors) and feels solid and properly weighted. It is well made in Japan.
with Sketchbook Pro for iPad ($4.99) makes a powerful drawing system. I prefer this to using a Wacom tablet for drawing since I can directly see what I’m doing under the stylus.
to be the best available so far. The reason is that others have a thicker pointing area that slides poorly and is less precise. The Bamboo Stylus
is the best out there.


