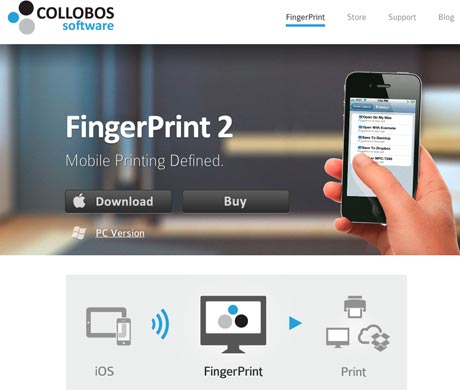
While there is a free solution for printing from iOS using a printer connected to a Mac, Windows has a good paid solution from Collobos called FingerPrint 2. If you’re looking to print from your iPad, iPhone, or iPod Touch, this is a simple solution that costs $19.95.
Rejuvenate Original iPhone with Whited00r
No Apps
The original iPhone can only be updated to run version 3.1.3 of iOS. This means that the vast majority of apps in the iTunes App Store can not be loaded onto the original iPhone. It would be nice if Apple allowed developers to keep old versions in the App Store for people with old devices. But since they don’t, it’s great that you can jailbreak the phone to allow many apps to run.
Jailbreak Steps
I followed these instructions from iPhoneBlogr. This not only jailbroke the phone. It also unlocked the phone so that it could be used on non-AT&T carriers, especially useful if I want to use the phone when traveling abroad.
Then I restored the phone in iTunes using Whited00r 5.1.
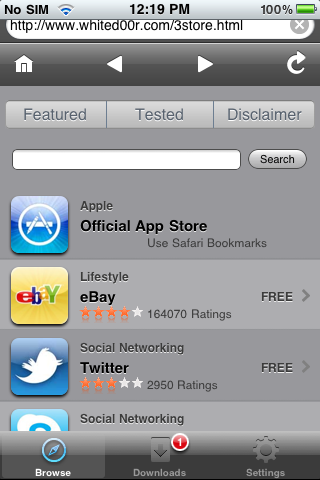
Whited00r gives you a new app store with a links to older working versions of Skype, Twitter, Facebook, etc.
Conclusion
Performing the jailbreak can be a little scary for some people. But if you have your iPhone 2G or original iPod Touch in the closet or ready to go in the trash, give this a try. They are still good devices if you make the Whited00r updates.
First Real Malware for Mac
Flashback
Flashback is the first malware (malicious software or virus) for the Mac that people should worry about. It can infect computers through a vulnerability in Java. It’s estimated that 600,000 Macs have been infected, about 1% of Macs in use. Flashback collects personal information such as bank and login information. To see if your Mac is already infected, follow the instructions from Macworld.
Unlike with Windows PCs, this phenomena is new to Macs. The closest previous infection I remember was when a torrent version of Apple iWork ’09 contained a trojan. But that just impacted people who downloaded the pirated torrent. Flashback is far worse since someone can get it by just visiting a website.
Protection
It’s easy to protect yourself against malware and viruses on a Mac. There is no need to buy anti-virus software which doesn’t really help much on a Mac. Instead, take these steps that deal with the exploits of Java and Flash.
1. Perform Software Update
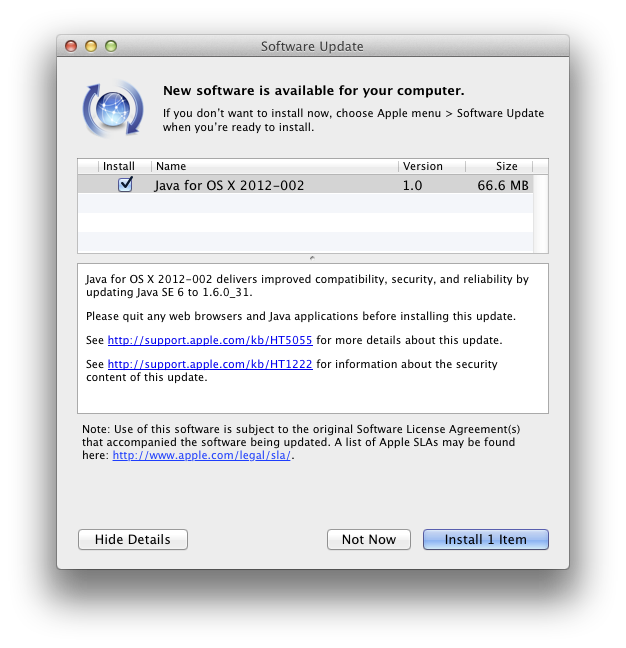
Apple’s updates automatically patch Java and remove Flashback. Open System Preferences and go to Software Update, Check Now.
2. Disable Java in any web browser you use
Safari
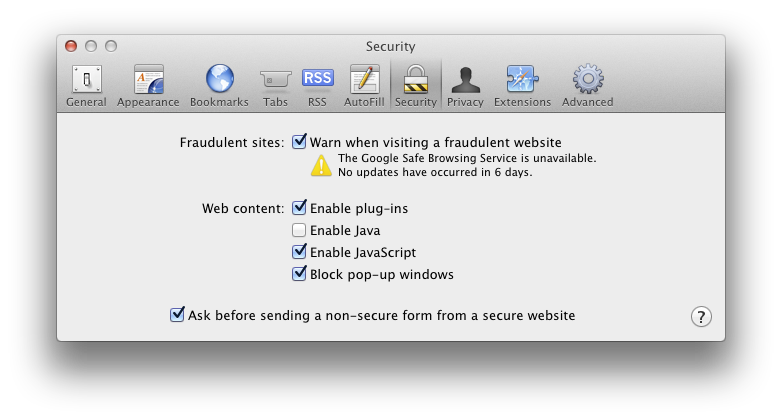
Go to the menu item:
Preferences -> Security -> Web Content
Uncheck Enable Java
Chrome
Go to the URL:
chrome://plugins/
Click Disable for Java
Firefox
Go to the menu item:
Tools -> Add-ons
Click on Plugins and click Disable for the Java Applet Plug-in
3. Install a Flash Blocker
My favorite is ClickToFlash, the Safari Extension which gives you access to Flash content if you click on the Flash window. This has the additional benefit of hiding annoying Flash ads.
Another tool I use is FlashFrozen, available for $0.99 through the Mac App Store. This handles all Flash running on your computer. It is especially useful for Mac laptops which can have their batteries quickly run down by errant Flash sites.
UPDATE: Oracle (the owners of Java) have released their own Java updates now. If you have Java installed on your system, you should get the latest Java SE Development Kit from here:
http://www.oracle.com/technetwork/java/javase/downloads/jdk-7u4-downloads-1591156.html
After installing, go to Utilities – Java Preference. From there, drag the latest Java to the top. As of this writing, that is Java SE 7. Uncheck the older Java versions. The next time you start a program that uses Java, it will now use the newer Oracle Java that has the latest security patches.
Fax a PDF from a Mac
Faxing seems to be an ancient technology that just won’t die. It is still embraced, often even preferred or required, by many businesses. Most people don’t want to have to own a fax machine any more but do have to fax from time to time. There is a modern day solution. You can easily fax any PDF from a Mac. And since you can convert anything in a browser to a PDF easily on a Mac, it allows you to fax almost anything you could print out.
Apple makes a USB fax modem but sadly, they’ve not maintained it so it doesn’t work on the latest Macs any more. Fortunately, US Robotics makes a great US Robotics USB Fax Modem that is compatible with a Mac.
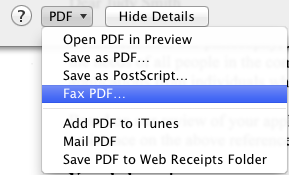
Once plugged into a Mac, you’ll notice you have gained a new option via the Print PDF menu.
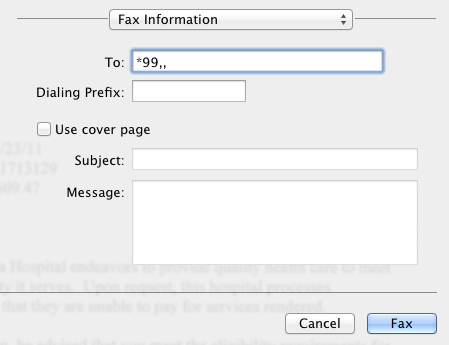
If you’re like me and have dropped your expensive home phone service for a cheaper Voice over IP phone line, then you may have a little more work to do to actually get a fax to go through. In the case of the popular Ooma Telo Free Home Phone Service, you have to tell the line that you are about to fax so it can optimize the connection. This is done by prepending a *99,, to the phone number you are faxing to.
iTunes Match
Benefits
iTunes Match accomplishes a few things for me:
- Updates my collection to 256 kbps aac files (higher quality)
- Backs up my collection online (iCloud)
- Makes it easier to use other Apple products for my music collection without needing to download everything. This makes it easier to use a lower capacity laptop, iPhone, or iPad.
It’s worked pretty seamlessly for me and costs $25/year, although you only need one year if you just are interested in accomplishing #1 above.
Updating to 256 kbps
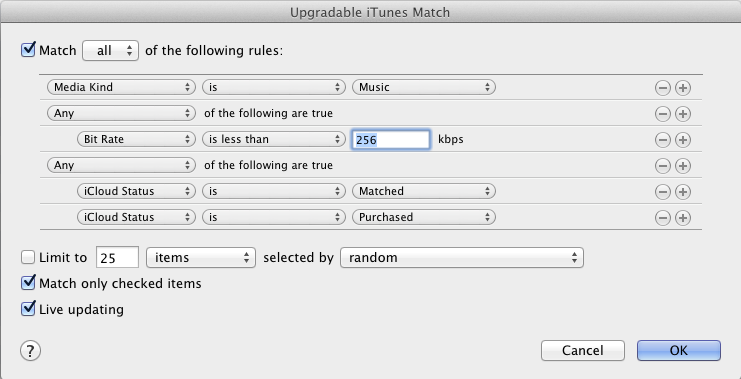
I followed the Macworld instructions to create a Smart Playlist that shows just the songs needing an upgrade (see picture). Hold down option key when clicking the plus to add the conditional rule for iCloud Matched or Purchased.
Then I selected all the files and deleted them, making sure to NOT select to delete them from iCloud. Then I downloaded the files over a couple of days.

