The Mac OS includes software RAID options. Using the striping option, you can double your storage and greatly improve your read/write performance. But what is the true performance gain and is it worth doing?

What you need
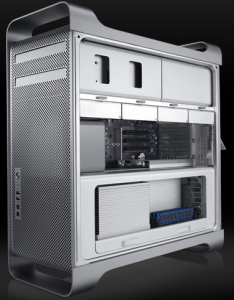
First, you need a Mac capable of holding at least 2 drives. This is actually a problem for most Macs. Only the Mac Pro is capable of that off the shelf. The Mac Mini can be hacked to do so but it involves removing the DVD drive and soldering in a 2nd hard drive. The system I used in this test is the latest entry-level Mac Pro
from early 2009.
Second, you need another hard drive. The Mac Pro can actually hold 4 but for the purposes of this test, I’m only adding 1. This Mac Pro comes with a 640GB Western Digital Caviar Blue so I purchased another identical to that. It is best to have 2 identical drives when doing striping so that both drives can be fully used. If you’re looking for Mac Mini drives, we recommend the 500GB Western Digital Scorpio Blue
.
Backup original drive
In order to add the 2nd drive, you’ll need to fully backup your first drive so that you can restore it later. When creating a RAID setup, the drives will be wiped clean. If you already have a time machine backup, you can do a restore from that but I prefer using Disk Utility to do a backup and restore because it can create a fully bootable 100% identical backup that you can then restore from Disk Utility off of a Leopard boot disc. Disk Utility doesn’t word things very well. Both a backup and a restore are both under the Restore tab. When you backup, you just do a restore from your Macintosh HD to your external backup drive. If you want the backup to be bootable, be sure it is partitioned with a GUID Partition Table scheme under Options.
Add the drive
Now that your data is backed up, you can add your new drive. In the Mac Pro, this is the quickest and easiest hard drive addition ever. Simply unlatch the drive holders and slide one out. There are 4 screws already in there waiting to go into the new drive. Then you just slide in the new drive and that’s it. If you’re using a Mac Mini, you’ll need to follow this Mac Mini upgrade guide.

Create the RAID
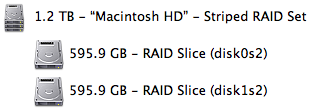
Boot up the mac off of a Leopard disc by holding down C. Choose your language and then you’ll be able to launch Disk Utility from the top menu. Select one of the drives and go to the RAID tab. Enter the RAID Set Name to be the standard drive name Macintosh HD. Then drag both of your drives to the RAID set window. Both will show up and show the combined storage based on your RAID type. Mirroring is for a duplicate backup. Striping is for performance and extra storage. You can select Create to create the software RAID and it shouldn’t take more than a few minutes.
Restore
If you did a time machine backup, you can go through the standard Leopard install and choose restore from time machine. If you did a disk utility backup, select your new Macintosh HD volume and go to the Restore tab. Choose your external backup drive as your source and the Macintosh HD as the destination. If you have a lot of data, this can take several hours. If all went well, your system should now be able to boot off your new striping RAID Macintosh HD volume.
Performance
Now that we’ve got our striping RAID, how does it perform? Using the Xbench disk test, the drive performance has gone from a score of 73 to 112. That’s about a 53% improvement overall. The test uses a variety of disk usage and this striping will perform differently based on exactly how the data is being used. The biggest benefit will be for large files. For example, if you use a virtual machine like VMware Fusion, the virtual RAM is written and read to the hard drive when you do a suspend or resume of the OS. The result is that with a striping RAID volume, this feels about twice as fast. Striping also combines the drives so you double the capacity.
The down side
The biggest negative is that with 2 drives required to be working, we’ve doubled the likelihood of the Macintosh HD volume failing. If just 1 drive breaks, the whole volume is lost. Fortunately, Apple provides time machine which gives us a reliable and effortless backup. If you do lose a drive, you’ll need to replace the bad drive and restart the RAID set from scratch and restore. Another downside is that because this is a software RAID, it does use a little CPU which hardware RAID would not. But a Mac Pro hardware RAID card will set you back $700 and the CPU usage is so small, I can’t even notice it when looking at Activity Monitor.
Conclusion
If you want to massively improve your disk performance, adding a second drive and creating a striping RAID set is a great choice. This is easy in a Mac Pro but can be done on a Mac Mini with some work. Just be sure you always have a time machine backup running in case your RAID fails.
I’ve found that time machine errors out when backing up a striped software raid. Have you come across this?
I have software RAID on my MacBook Pro using the Optibay and it works perfectly. The data rate has almost doubled. I haven’t noticed any processor usage impact on my MacBook Pro and I would recommend it to anyone.
Obviously you do lose out on having your superdrive at all times but you do get a little external enclosure which works well. But having 1TB of storage on my MacBook Pro is amazing, the speed increase is just a bonus.
I carried out the work flow above to create a mirrored raid. Sadly after my OS X 10.6.3 installed ‘successfully’ I did the obligatory restart and bingo… My machine turned into a bowl of jelly.
I had flashing folder of doom, I had a circle with a very neat line drawn through it… Until I finally managed to reboot of cd.. Then couldn’t erase the raid, reformat the drives getting different error for each drive
POSIX reports: the operation couldn’t be completed. Cannot allocate memory
Or
As above then input/output error
I had to remove the hard drives from bay 1 and 2, disconnect my dvd recorder, and reset the board, then remount the drives before I could reformat them and re install 10.6.3
Does any one out the know why that would happen? Is the board goosed?
Thanks
John
I striped just two drives and got phenomenal improvement. The weird thing is it is inconsistent. I sometimes get as high as 150, but sometimes as low as 99. That’s with nothing else running, and disks up to spin speed. For the life of me, I can’t determine what causes the difference. I checked Activity Monitor to make sure no activity was occurring on the CPU or disk. Weird.