Old Kindle and Kindle 2 users get no improved battery life

Kindle Battery Update.. Not For Most PeopleKindle 2
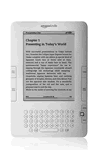
It has been widely reported that the recent Kindle firmware update improved battery life up to 85%. Unfortunately, this is not true for almost all Kindle owners.  The battery life improvement only applies to the recent Kindle 2 (Global Wireless) version that was introduced October 7, 2009.  The original Kindle and Kindle 2 (U.S. Wireless) version see no such benefit. Amazon points this out in a roundabout way on their site.

The Kindle 2 (U.S. Wireless) version does get the other benefits like built-in PDF reader and manual screen rotation.

Aluminum iMac Hard Drive Upgrade

What you need

1. T6 and T8 torx screwdrivers
2. Phillips Head screwdriver
3. Microfiber cleaning cloth
4. Suction cups
5. External USB or firewire backup hard drive
6. New SATA hard drive. We recommend the 1.5TB Western Digital Green Drive

Step 1 – Backup via Time Machine

Before you start, you have to first make sure you have a recent time machine backup.  After installing the new drive, we will restore from this backup.

imac ram slot

Step 2 – Remove RAM slot

The RAM slot is held on with just 1 screw.  Unscrew it and pop off the panel.  The screw does not fall out but remains in the panel itself.  If you are upgrading RAM, this all all you need to do.

imac-hdd-02

Step 3 – Remove the glass screen

This may seem like a scary step but it is extremely easy.  Firmly attach suction cups at opposite corners.  Then gently lift up.  The glass is held on with magnets and comes off with very little effort.  I recommend laying out a towel or paper towels to lay the glass on.  Be careful not to scratch the glass or screen beneath it.  If at all possible, try to do this work in a non dusty area because we will later need to clean off the dust between the glass and LCD screen.

imac-hdd-03Step 4 – Remove front aluminum casing

There are 12 screws around the edges holding on the front aluminum casing.  Unscrew them all keeping track of which ones go where since they are varying lengths.  You can then lift upwards around the edges to take off the front casing.  Flip it towards the top of the imac and lay it on the table above it so that you do not have to unhook the camera.

imac-hdd-04Step 5 – Remove LCD panel

The LCD is held down with 8 screws on the sides which need to be removed.  There is a cable marked in green toward the bottom which needs to be unhooked.  There is also a connector to the right marked in yellow that is held down with 2 screws.  Remove the screws and pull the connector upwards to unhook it.  You should then lift up the LCD gently where you will see 2 power connectors toward the upper right that need unplugging.  The LCD should then be free to place elsewhere.  The hard drive will now be visible.

imac-hdd-05Step 6 – Remove the old hard drive

There is a cushion glued on top of the heat sensor cable.  Gently pull up this cushion keeping it in one piece and try to maintain its stickiness for later.  The heat sensor is held in place in a plastic notch and can slide out of it.

imac-hdd-06

imac-hdd-07There is a black plastic bar holding the hard drive in place.  Lift it up from left to right to unlock it.  This can be very challenging since it is tight.  The drive can then slide up and out and you can unhook the power and SATA cables.

imac-hdd-08

Step 7 – Add the new hard drive

There are 4 screws on the old hard drive which need to be removed and added to the new hard drive so that it can slide into the holders on the iMac.  Once the power and SATA cables are plugged back in, you can slide it back in and lower the black plastic bar to lock it in place.  Place the heat sensor on the drive in about the same area where it was and use the sticky cushion to hold it in place.  If it doesn’t seem sticky enough to hold, you can get some rubber cement from your local home depot and add just a bit to hold it in place.

Step 8 – Put the system back together

Rebuilding the system is mostly straightforward.  It can be handy to have an extra pair of hands to hold the LCD as you reconnect the power cables.  We recommend you lay out the screws in an orderly manner so that you know exactly which one goes where as you rebuild.

Once the system is rebuilt except for the glass, you want to use the microfiber cloth to remove any dust or debris on the front of the LCD screen and back of the glass.  You will also need to use the microfiber cloth to clean the front of the glass once you remove the suction cups.

imac-hdd-10Step 9 – Restore from Time Machine backup

When you first boot up, insert the Mac OS X install disc and hold down the option key while booting so you can select the disc to boot from.

Step through the install until the Utilities menu appears at the top of the screen.  First use Disk Utility to erase the disk and create a volume.  Then choose to restore from backup from the same menu and choose your external time machine backup.  Your system will then be just as it was except with a new hard drive.

Replace UPS Batteries

If you have computers or electronics that you don’t want to be killed by power fluctuations, it’s a good idea to have a UPS (Uninterruptible Power Supply). The battery in the UPS keeps your equipment running through blackouts our brownouts (reduced power).

Dead Battery

The main problem with a UPS is that its battery might only last a couple of years. A dead battery is often announced by a UPS through regular beeping. Because a UPS is expensive, consider just replacing the battery instead of the whole UPS when the battery dies.

You can buy a replacement from the UPS company or for significantly less money from a third party such as Battery Mart. Just be sure to get a battery that is designed for your specific UPS. I have had good luck with with Battery Mart, but there are some third party batteries which are of poor quality, possibly having a short life, acid leakage, or even causing a fire.

I replaced the battery for the APC Back-UPS 500 ES for $26.39 from Battery Mart instead of $48.99 from APC (prices include shipping).

Battery Mart Replacement Battery

Flash Drive Speeds

What should be important to you when buying a flash drive, besides capacity? Speed and reliability.

Amazon and Newegg provide useful user reviews that can alert you to drives with high failure rates. I also look for good read and write speeds.

Read and Write Speeds

Flash DrivesSpeed tests can be calculated manually, but I used HD_Speed software to determine speeds of these common drives.

Size GB Read MB/s Write MB/s
Kingston DataTraveler I 8 17.8 7.8
SanDisk Cruzer Micro 16 24.9 5.2
Corsair Flash Voyager 16 28.8 6.9
Kingston DataTraveler 200 64 28.6 10.7

The speeds will vary depending on the size of the files transferred (block size). Larger files can be moved more efficiently than smaller files.

As you can see, the write speeds lag the read speeds. The latest generation of flash drives, such as the Kingston DataTraveler 200, are often significantly faster than older models.

Fast read speeds do not always translate into relatively fast write speeds, as demonstrated by the SanDisk Cruzer’s slower write speed than the Kingston DataTraveler I.

Speed should be more important to you when looking at larger drives since you’ll really notice it when moving more data. People didn’t tend to worry about the speed of 3.5 inch floppy drives when they only held 1.4 MB of data.

Counterfeits

Another thing to watch for is counterfeits. Apparently there are several counterfeits of the Kingston DataTraveler 150 64GB often sold on eBay for around $50, less than half what they currently should cost. These drives still have 64GB of storage. They are just slow and prone to failure, leaving you without your data.

Counterfiet Flash Drive on eBay

T1 Business Support from Verizon

Lightning Strikes

A  small office near Dulles airport in Virginia had a Business T1 line from Verizon because they didn’t qualify for DSL or cable Internet. Everything was working great for about 3 months. Then there was a big lightning storm.

When people showed up to work the next day, the Internet was down. Verizon told them that the line was good and that it was likely due to their router being hit by lightning. This seemed to make sense. But unfortunately Verizon was no longer responsible for the router after they installed it. Even though Verizon had sold them the router and set up all its configuration files, it was the office’s responsibility to diagnose any router problems and fix it. So the office asked me to take a look.

Finger Pointing

I ran a series of T1 loopback tests on the router and everything responded correctly. I even spoke to Adtran (makers of the router) and they agreed that everything looked good. So I called Verizon. Then the fun back and forth began.

Verizon VanVerizon said that they were sure it wasn’t their fault because they ran their own loopback tests. I asked them to come out. Eventually they did, but they didn’t come out when they said they would so I didn’t get to see them do any tests. When they reported that everything was fine, I didn’t believe them. I knew that they hadn’t even gone into the room with the customer jack and router since no one in the office saw Verizon enter the building.

So I had to set up what Verizon calls a “vendor meet”. Verizon said this was the only way to arrange a specific time. But Verizon warned me that if it didn’t end up being their problem, the business would be charged. Verizon didn’t show up for our first vendor meet because one of their techs was sick. On their second meet, the tech noticed some weird line activity but the Internet came back up.

The next day the line was down again. This process happened three more times, with the Internet going in and out and Verizon coming out occasionally but still maintaining that it was probably the router. Four weeks after the storm, one of Verizon’s techs finally switched out their line between the phone room and the customer jack. That fixed the problem and it has been up ever since.

The router wasn’t broken. Evidently the storm somehow damaged the last bit of line that Verizon owned, but that line was past the phone room that Verizon typically tested against.

The office had been ready to give up when this was finally solved. They were going to move to a cellular Internet solution.

Lesson: Verizon Sucks

This story illustrates Verizon’s failure to properly handle their business customers who pay $500 per month for T1 Internet service. By not being responsible for the router that they sold, Verizon was able to just point fingers instead of properly investigating the problem. Small businesses without a tech staff have no way of dealing with that. They can’t easily log into the routers and type Cisco commands to prove Verizon wrong. These aren’t as simple as Linksys routers for the home.

Verizon should provide a business solution that is responsible for Internet all the way to the local area network. This would have saved the customer a lot of time and money.

The only positive thing that I can say about Verizon is that at least they aren’t Comcast.