Macworld 2009 Preview
 Macworld, the expo for new Apple and 3rd party products, will be January 5-9th. As usual, everyone is speculating about what new products might be coming.
Computers
The new 13.3″ MacBooks and 15″ MacBook Pros arrived September 2008, leaving the 17″ MacBook Pro still to be upgraded.
The iMac is expected to get a big upgrade with the new Intel chips announced today. The Mac Mini should be updated as well.
There have not been many rumors about a new Mac desktop, but it is possible that the Mac Mini could be redesigned to better fit some standard desktop components and reduce costs. This could be a return of the Mac Cube.
Also not expected, an Apple netbook (small and relatively cheap) is a possible new product that has been speculated about. But with a MacBook Air already being so thin, the role of a small Apple laptop is taken. Apple does not typically try to compete on price in the low end of the market. Perhaps a small touch screen laptop (an iPod Touch-like device) could be on offer.
Operating System
The computer updates should be adding new dedicated GPUs (graphics cards) so that Apple’s entire line can take better advantage of the upcoming Snow Leopard OS X 10.6 which will allow applications to use GPUs for non-graphics tasks. Snow Leopard’s new capabilities, mainly under-the-hood improvements for stability and speed, are expected to be a big part of Macworld.
iPods
The iPod Nano, Touch, and Classic were updated in September 2008, so no updates are due. The Shuffle has received several color lineup changes, but has not really changed since September 2006. With many new small and cheap competitors, Apple could update the Shuffle or just continue to slowly lower its price.
iPhone
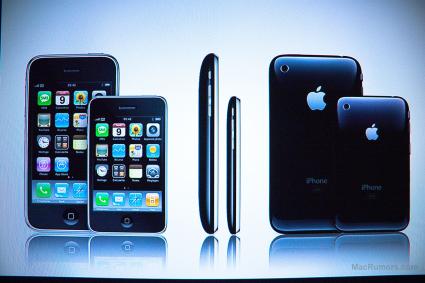 There are rumors from case manufacturers that a new iPhone Nano with a smaller body will be coming out. This is a heavily debated topic, as many Apple fans believe this doesn’t make sense. But Wall Street analysts expect an iPhone Nano to be arriving soon.
The iPhone 3G has been at 8 and 16GB models since its July 2008 introduction. A jump to 32GB would be logical in early 2009, especially since the iPod Touch can have 32GB. The sale of 8GB refubished models currently at $99 also supports the move to higher capacity models.
No Steve Jobs
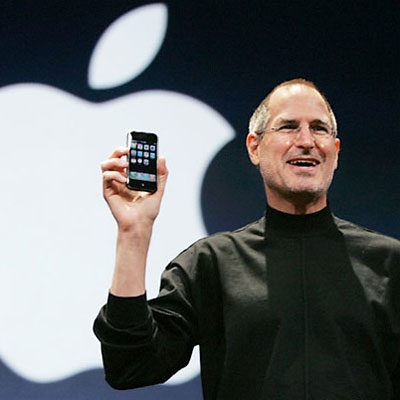 A big concern among Apple fans is that MacWorld will not have a keynote by Steve Jobs. Instead VP of Marketing Phil Schiller will be keynoting on Tuesday January 6th at 9:00 a.m. – 10:30 a.m. PST. The unfounded speculation is that this is because Steve Jobs is having health problems, perhaps related to his pancreatic cancerous tumor which he had removed in 2004. This story was revived again today with a new “reliable source” saying that Steve’s health is a bigger problem than we realize.
Even if this is the case, we should remember that Steve’s personality and views are now a part of Apple. He made his return to Apple in 1996, when Apple purchased his company NeXT to use in their new OS X operating system. Steve Jobs setup an executive team that includes award winning designer Jonathan Ive, who created the iMac, aluminum PowerBook G4, MacBook Pro, iPod and iPhone. The executives share Steve’s vision and would be able to carry it out even if he had to step down as CEO.
Apple says that this will be their last Macworld. They appear to be trying to tamp down the fanfare and anticipation of new products, replacing it by regular new product introductions that better fit their schedule.
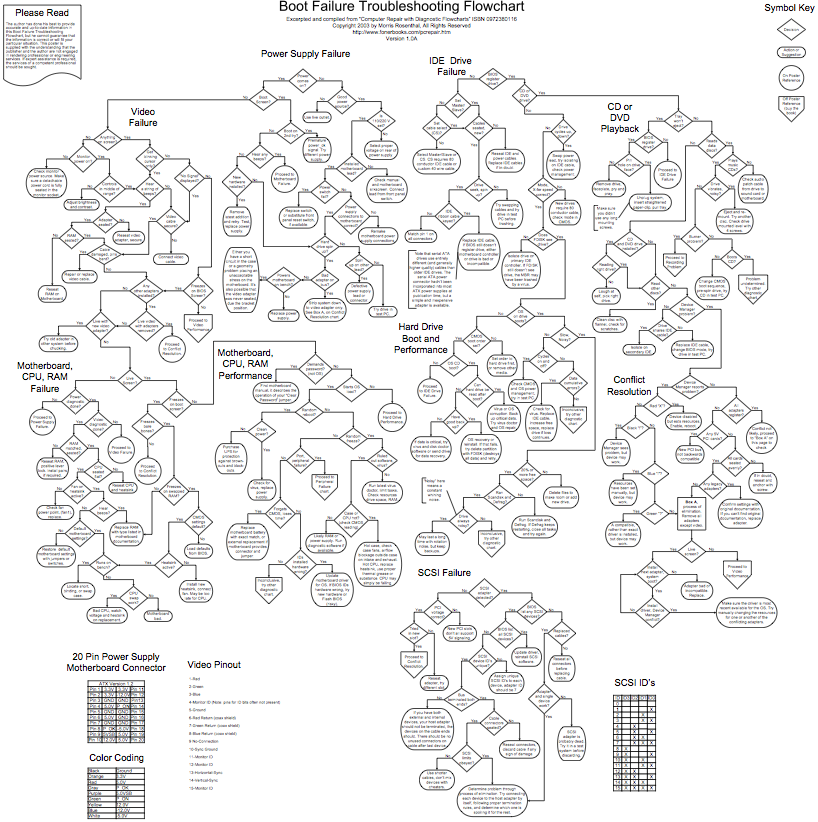 The most comprehensive of these flowcharts is the Boot Failure Troubleshooting Flowchart which encompasses several smaller flowcharts. You can see that it is PC focused, asking you to run scandisk and FDISK on your hard drive. Still, the principles apply to any computer.
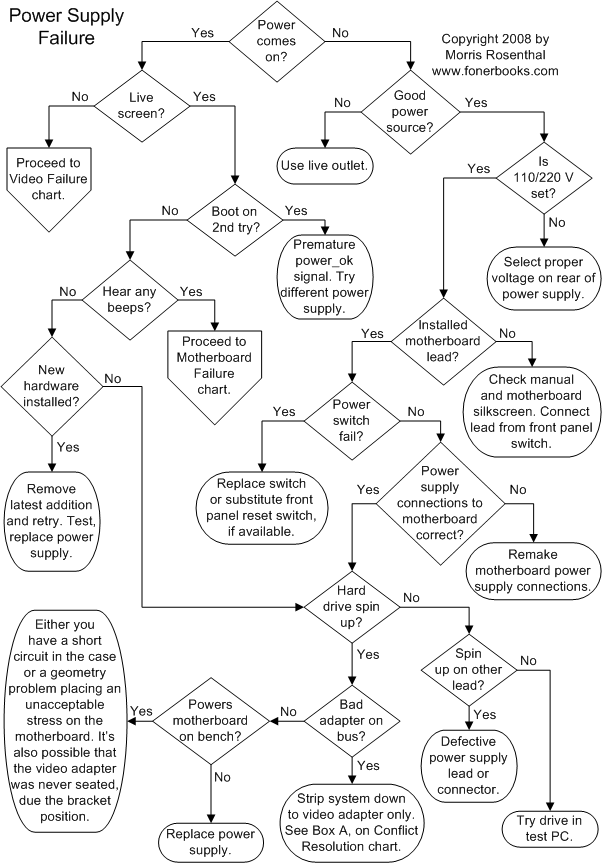 Power Supplies commonly break, especially if they are hit by a power surge (too much power, such as when hit by lightning), blackout (no power), or brownout (lower voltage power).
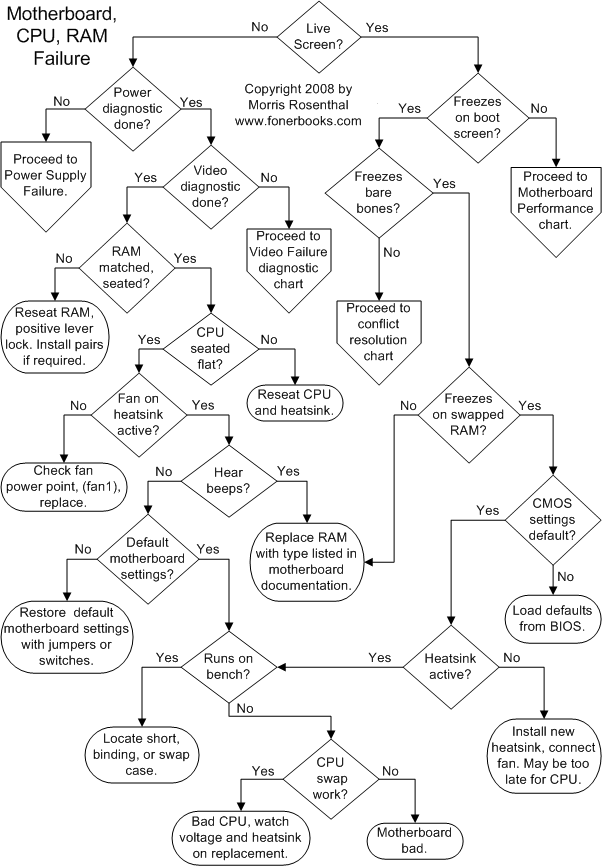 RAM problems can be vexing because they might only appear when a particular part of the RAM is accessed. This can manifest itself through strange computer behaviors that are often mistaken for viruses.
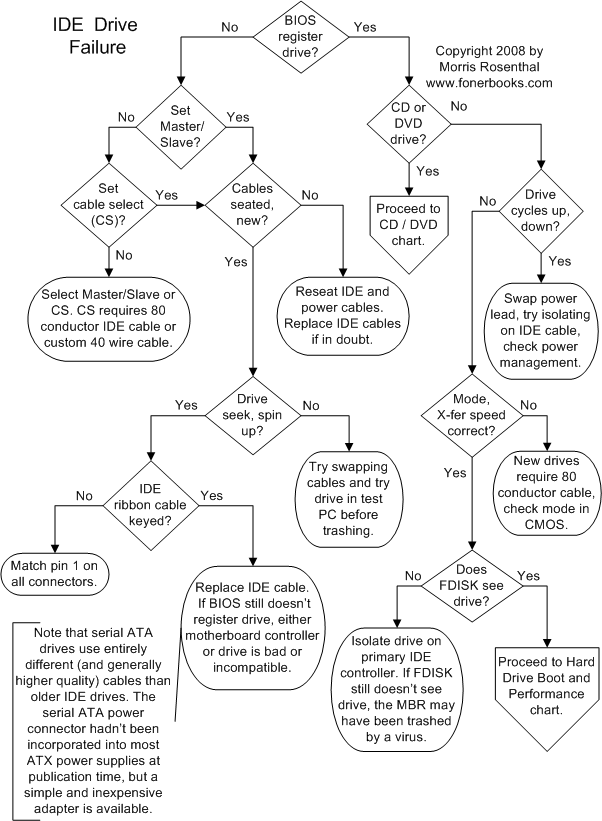 With spinning disks and moving heads, hard drives will eventually fail. Many of today’s laptop hard drives have accelerometers built-in so that they can protect the hard drive when you are moving the laptop. But the moving parts will eventually break. Studies show annual hard drive failure rates to be 2-13%, depending on usage and particular model used. Over the next 5 years there is expected to be a transition to primarily using solid state drives (SSDs) that can potentially last longer and use less energy.
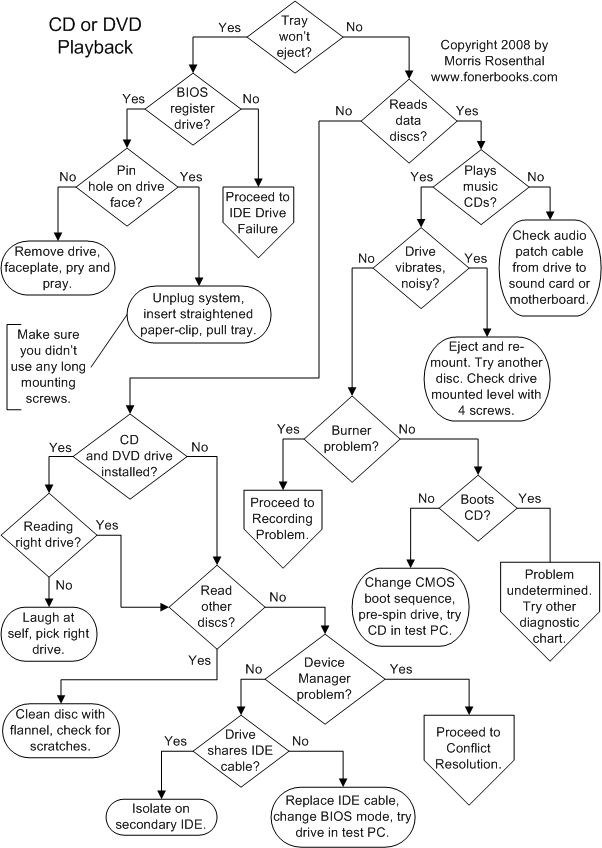 Again, this chart assumes that you are using an IDE connector, not today’s standard of SATA drives.
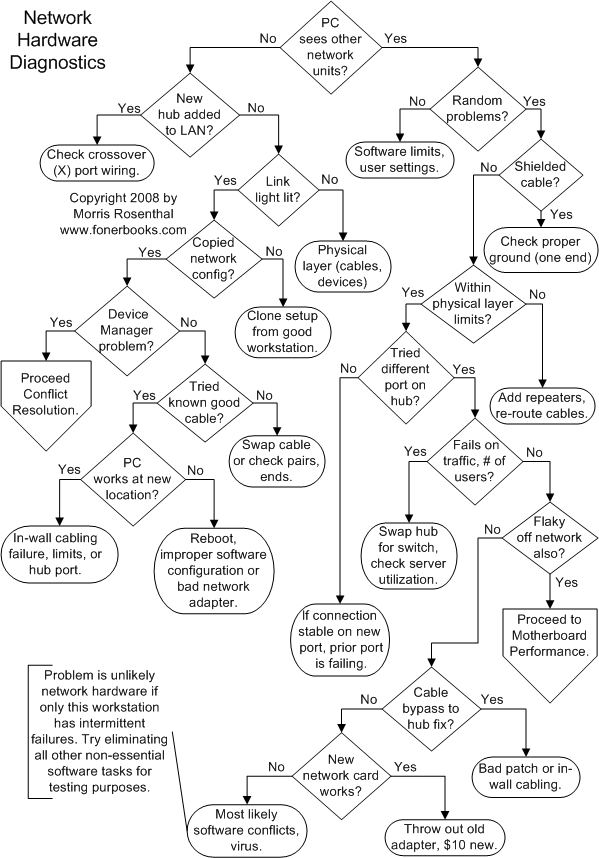 This is another case where it is useful to have other computers available to determine if the problem is related to the network (cables, router, switch) or the computer.

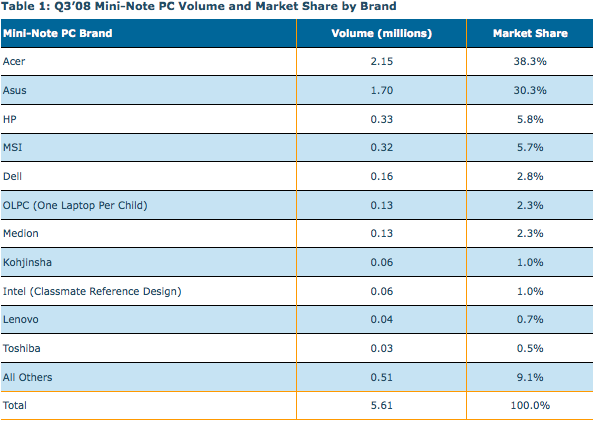
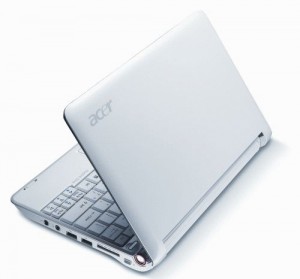 Our current favorite small netbook, the Acer Aspire One, is now the #1 selling netbook according to 3Q sales numbers as reported by
 Old computers and monitors have harmful materials that can seep into the ground water and air if thrown in your normal trash. The cadmium and mercury in displays can damage the nervous system. Computers also may contain lead (causing birth defects and learning disabilities) and CFCs (destroying the ozone layer).
